Thinking about selling products online without rebuilding your entire website? If you already have a site on platforms like WordPress, Webflow, or even a custom-coded setup, you don’t need to start from scratch. With Shopify’s Buy Button, you can easily embed eCommerce functionality like product displays, shopping carts, and secure checkout directly into your existing website. It’s a quick, flexible way to start selling online without the need for a full redesign or platform migration.
For those looking to get it right the first time, professional Shopify web development services can help ensure the integration is smooth, secure, and perfectly aligned with your brand. In this guide, we’ll walk you through why embedding Shopify is a smart move, how the Buy Button works, and how to add it step-by-step. We’ll also share expert tips on customization and explain when it might be worth considering a full migration to Shopify’s robust eCommerce platform.
Table of Contents
ToggleWhy Embed Shopify Instead of Migrating?
If you’re satisfied with your current website’s design and content management system (CMS), embedding Shopify may be a more efficient solution than a full migration. Here’s why:
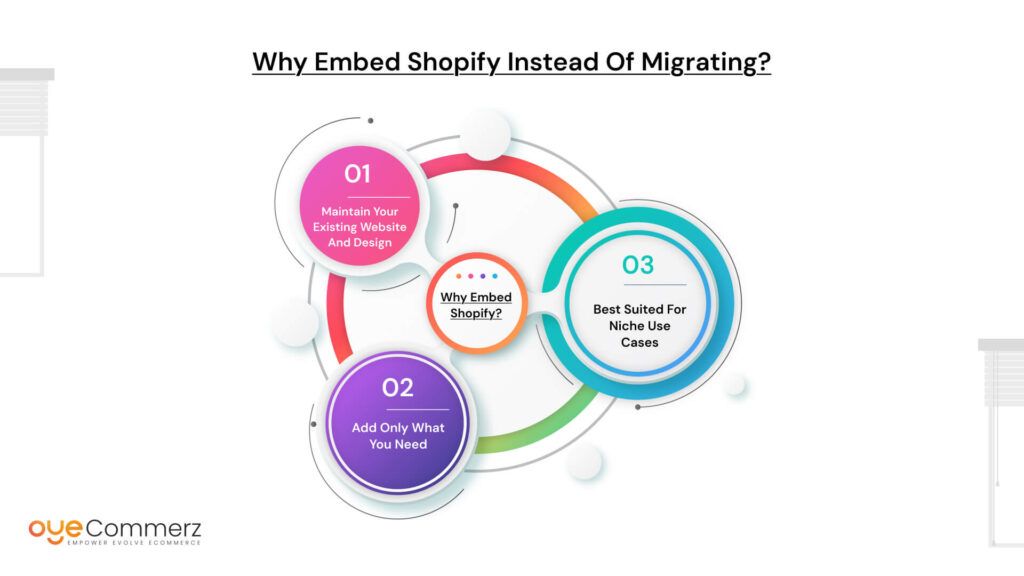
Maintain Your Existing Website and Design
You don’t have to overhaul your site. Continue using your current platform whether it’s WordPress, Webflow, Squarespace, or another CMS while adding only the eCommerce capabilities you need from Shopify.
Add Only What You Need
Instead of moving your entire site to Shopify, you can embed specific features such as product listings, a shopping cart, or a secure checkout process. This allows you to enhance your site with sales functionality without affecting its core structure or purpose.
Best Suited for Niche Use Cases
Embedding Shopify is an ideal option for websites that want to sell a limited number of products or services. It works well for:
- Bloggers looking to offer merchandise or digital downloads
- Service-based websites adding product sales or appointment bookings
- Portfolios selling prints, artwork, or exclusive items
This approach provides a lightweight, flexible way to sell online while keeping your primary website intact.
What Are Shopify Buy Buttons?
Shopify Buy Buttons are a feature of Shopify’s Buy Button sales channel, designed for users who want to sell products online without setting up a full Shopify store or migrating their entire website. Essentially, they allow you to embed Shopify’s eCommerce capabilities such as product display, cart, and checkout directly into your existing website or blog, using simple HTML code.
This tool is especially useful for creators, service providers, bloggers, or small businesses that want to add online selling functionality to their current website built on platforms like WordPress, Squarespace, Webflow, Wix, or even custom HTML sites.
What Is the Shopify Buy Button Sales Channel?
The Buy Button sales channel is a built-in feature of Shopify that provides a simple way to generate embeddable code snippets for products, collections, or cart buttons. Once you enable this channel in your Shopify admin panel, you can generate and customize code to place on your external site.
Unlike a full Shopify store, which requires designing an entire storefront, this channel focuses solely on transactional elements allowing you to sell without restructuring your website.
Types of Shopify Buy Buttons
Shopify offers three main types of Buy Buttons, each serving a specific use case:
- Product Buy Button
This is a widget for a single product. It includes the product image, title, price, variant selection (if applicable), quantity selector, and an “Add to Cart” or “Buy Now” button. You can customize the layout to suit your site’s design.
Use Case: Selling one or two items directly from a blog post, landing page, or service page. - Collection Buy Button
This button displays multiple products from a designated collection. Customers can browse a group of products and add items to their cart without leaving the page.
Use Case: Embedding a product gallery on a portfolio or category page, such as “Prints for Sale” or “Workshop Merchandise.” - Shopping Cart Button
This option adds a persistent shopping cart to your website. When users click “Add to Cart” from any product or collection embed, the cart is updated. Customers can view, edit, and proceed to checkout all within the embedded experience.
Use Case: Needed when selling multiple products or offering customers the ability to buy more than one item at once.
How Shopify Buy Buttons Work
Front-End Experience (What Visitors See)
From the user’s perspective, Buy Buttons look like a natural part of your website. Shopify provides customization tools so you can match the button’s style with your site’s fonts, colors, and layout.
When a visitor clicks a Buy Button:
- For single products: A modal or inline product panel appears with purchasing options.
- For collections: The user can browse all listed items and add multiple products to their cart.
- For carts: The visitor can review items, make changes, and securely proceed to checkout, all in a smooth, embedded interface.
Checkout is powered by Shopify’s infrastructure, ensuring fast, secure transactions even though the website is hosted externally.
Back-End Management (Your Admin Experience)
All the eCommerce functionality runs on Shopify’s backend, even if the storefront lives elsewhere.
- Product Management: You add and update products directly in your Shopify dashboard. Any changes like pricing, availability, images, or descriptions are reflected instantly in the embedded buttons on your site.
Order Fulfillment: Orders placed via Buy Buttons appear in your Shopify Orders panel. You can process them just like orders from a full Shopify store. - Customer Tracking: Shopify collects and manages customer data, including emails and order history, giving you the same CRM capabilities you’d expect from a full store.
- Analytics: Shopify tracks performance, so you can monitor clicks, conversions, and sales for each Buy Button.
Why Use Shopify Buy Buttons?
- No Full Site Migration Required: You don’t need to redesign your website or transfer your content to Shopify. This is ideal for websites built on other platforms.
- Quick Setup: Generating and embedding a Buy Button takes minutes. You can start selling without setting up a complete eCommerce site.
- Customizable Design: Easily adjust the look and feel of Buy Buttons to blend into your existing site’s branding.
- Secure Checkout: Transactions are processed through Shopify’s secure, PCI-compliant checkout, ensuring customer data protection.
- Scalable: As your needs grow, you can switch from using Buy Buttons to building a full Shopify store without starting from scratch.
Prerequisites Before You Start
Before you can embed Shopify Buy Buttons into your existing website, there are a few essential requirements to ensure a smooth setup. These prerequisites help ensure that your site is ready to support embedded eCommerce features and that you have the tools necessary to manage your store effectively.
1. A Shopify Account
To use Buy Buttons, you need an active Shopify account.
- Any plan works, including the Shopify Lite plan, which is the most affordable option specifically designed for businesses that don’t need a full online store.
- The Shopify Lite plan provides access to the Buy Button sales channel, Shopify’s checkout system, order management tools, and customer support features.
2. Access to Your Website’s Code or CMS
You’ll need the ability to edit the HTML or code of your website, or use a CMS that supports custom code embeds.
- Most platforms like WordPress, Webflow, Squarespace, and Wix allow users to insert custom HTML into their pages.
- If your site is custom-built, you’ll need FTP or admin panel access to paste in the Buy Button embed code.
- If you’re using a no-code platform, ensure it supports script or iframe embeds.
3. Basic Knowledge of HTML/CSS (or Developer Support)
While Shopify provides a copy-paste embed code for Buy Buttons, some basic knowledge of HTML and CSS can help you:
- Insert the code into the right section of your page
- Customize the button’s look to match your site’s branding
- Troubleshoot layout or style conflicts with existing site elements
If you’re not comfortable working with code, it’s advisable to work with a developer or web manager who can handle the technical aspects for you. This ensures the Buy Button appears and functions correctly across all devices and browsers.
Step-by-Step Guide to Embedding Shopify into Your Website
Embedding Shopify into your existing site allows you to sell products without building a full eCommerce store. Follow this guide to set up Buy Buttons and integrate them into platforms like WordPress, Webflow, Wix, or a custom HTML site.
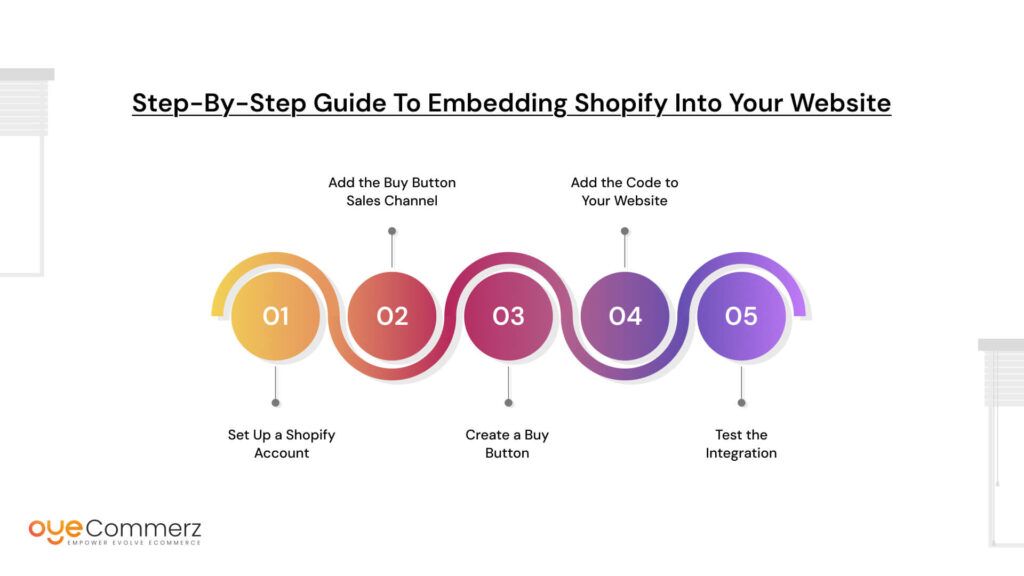
Step 1: Set Up a Shopify Account
To begin, you’ll need an active Shopify account.
How to Sign Up
- Go to shopify.com and click Start Free Trial.
- Enter your email, create a password, and provide a store name.
- Answer a few setup questions and access your Shopify admin dashboard.
Choosing the Right Plan
If you only want to embed products into your existing site and don’t need a full storefront, the Shopify Lite plan is ideal. It includes the Buy Button sales channel and all necessary backend tools like inventory, checkout, and order management.
Step 2: Add the Buy Button Sales Channel
Once you’re inside your Shopify dashboard:
- Click “Settings” > “Apps and sales channels”
- Click “Shopify App Store” and search for Buy Button
- Select the Buy Button app and click “Add app”
- After installation, the Buy Button will appear in your Sales Channels list
This enables the functionality you need to create and manage embeddable buttons.
Step 3: Create a Buy Button
After installing the Buy Button channel:
- Navigate to Sales Channels > Buy Button
- Click “Create a Buy Button”
- Choose whether you want to embed a Product, Collection, or Cart
Customize Your Button
- Select the product(s) you want to include
- Customize the layout (basic button, product card, modal popup, etc.)
- Adjust the button’s color, size, font, alignment, and behavior (e.g., open cart or direct checkout)
- Preview the button in real time
Generate the Embed Code
- Once customization is complete, click Generate Code
- Copy the HTML/JavaScript code provided is what you’ll paste into your website
Step 4: Add the Code to Your Website
For HTML Websites
- Open your page’s HTML file
- Paste the embed code where you want the button or product to appear
- Save and pload the file to your server
For WordPress
- Use the HTML block in the Block Editor (Gutenberg):
- Add a Custom HTML block
- Paste the Shopify embed code
- Preview and publish
- Alternatively, use a plugin like Insert Headers and Footers if you’re embedding site-wide buttons or cart code
For Webflow
- Drag the Embed element into your page layout
- Paste the Buy Button code inside the Embed block
- Save and publish
For Wix or Squarespace
- Navigate to your page editor
- Add a Custom Code Block or HTML Embed section
- Paste the embed code and adjust placement
- Save and test
Responsive Design Tips
- Use container elements or CSS styling to ensure buttons and product embeds resize properly on mobile devices
- If needed, wrap the embed code in a responsive div and apply max-width: 100% styling
- Test different screen sizes to make sure the design holds up visually
Step 5: Test the Integration
Once the Buy Button is embedded on your website:
Check for Proper Loading
- Visit the live page and confirm the Buy Button or product display appears
- Ensure styling matches your site’s branding
Test Functionality
- Add a product to the cart
- Navigate through the checkout process
- Complete a test order if needed (Shopify offers test payment options)
Cross-Device Testing
- View the page on mobile phones, tablets, and desktops
- Make sure the button loads and functions correctly on all screen sizes and browsers
- Check for slow load times, layout issues, or script conflicts with your existing site
Styling and Customization Tips
When embedding Shopify Buy Buttons into your existing website, maintaining visual consistency is essential. You want the embedded elements to feel like a natural part of your site not a disconnected add-on. Shopify offers several customization options out of the box, and with a little extra work, you can further refine the appearance and behavior using CSS and JavaScript.
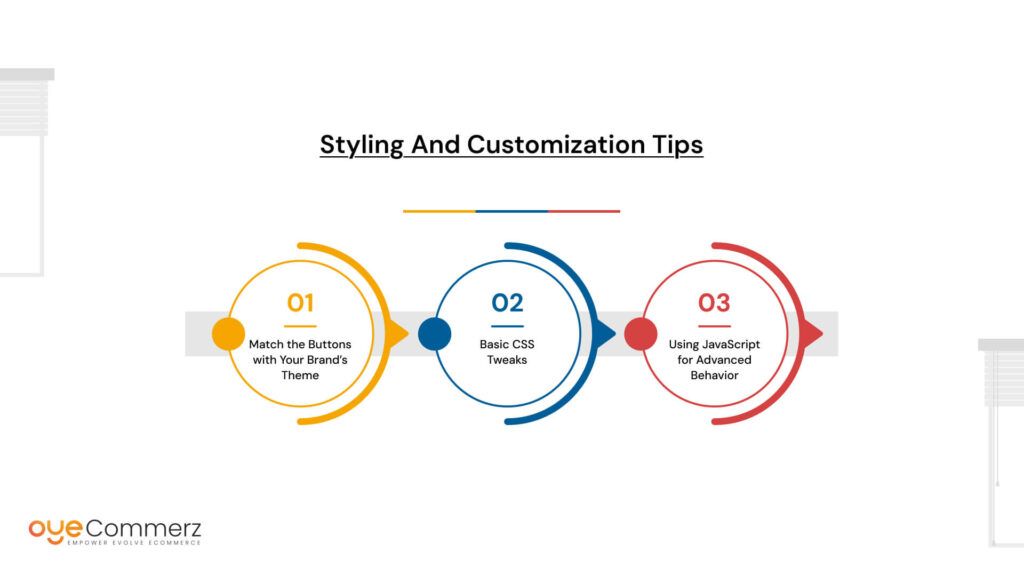
Match the Buttons with Your Brand’s Theme
During the Buy Button creation process in Shopify, you’ll have access to a visual editor that lets you configure:
- Button text and font style
- Color schemes (background, text, hover states)
- Layout style (inline, modal, product card)
- Alignment and padding
You should choose colors and fonts that match your existing branding to ensure a cohesive look across your website.
Tip: If your website uses a specific design system (like Material Design or Tailwind), try to match those rules in the customization process to maintain brand consistency.
Basic CSS Tweaks
After embedding the code, you can further refine its appearance using custom CSS. The Shopify Buy Button is rendered inside an iframe, so direct styling is limited but you can wrap the iframe in a container and style that wrapper as needed.
Example:
html
<div class=”shopify-button-wrapper”>
<!– Shopify Buy Button embed code goes here –>
</div>
CSS Example:
css
.shopify-button-wrapper {
max-width: 300px;
margin: 20px auto;
border: 1px solid #ddd;
padding: 15px;
background-color: #fafafa;
border-radius: 8px;
}
You can also control spacing, borders, mobile responsiveness, and even transitions for a more polished experience.
Using JavaScript for Advanced Behavior
If you want to go beyond the built-in features, JavaScript opens up advanced functionality such as:
1. Triggering Modal Carts
You can configure the Buy Button to open a modal cart or checkout popup instead of redirecting the user. This keeps users on the same page and creates a smoother shopping experience.
javascript
// Example setup (Shopify Buy SDK required)
var client = ShopifyBuy.buildClient({
domain: ‘your-store.myshopify.com’,
storefrontAccessToken: ‘your-access-token’
});
var ui = ShopifyBuy.UI.init(client);
ui.createComponent(‘product’, {
id: ‘PRODUCT_ID’,
node: document.getElementById(‘buy-button’),
options: {
product: {
buttonDestination: ‘modal’, // opens modal instead of redirect
},
cart: {
popup: true, // enables modal cart
}
}
});
2. Conditional Display Logic
Use JavaScript to hide or show Buy Buttons based on user behavior for example, only displaying them after a user logs in or scrolls to a certain part of the page.
3. Dynamic Product Embeds
Pull product IDs from a CMS or database and generate Buy Buttons dynamically, allowing non-developers to manage which products appear on the site.
Limitations of Embedding Shopify
While Shopify Buy Buttons offer a simple and flexible way to add eCommerce functionality to an existing website, it’s important to be aware of their limitations. This solution is ideal for selling a few products on a content-focused site but it doesn’t offer the full capabilities of a complete Shopify store.
1. No Access to Full Shopify Theme or App Features
When you use embedded Buy Buttons, you’re not running a full Shopify storefront. This means:
- No access to Shopify’s theme editor
You can’t design or customize an entire storefront using Shopify’s drag-and-drop tools or templates. - Limited integration with Shopify apps
Many apps in the Shopify App Store are designed to work with full stores and won’t function through Buy Button embeds alone. For example, apps for upselling, subscriptions, or advanced shipping calculators may not work. - No native blog, navigation, or page building within Shopify
Your content management and site structure continue to be handled entirely by your current website platform.
2. Inventory and Orders Managed Separately in Shopify
Even though your customers are shopping from your existing website, the backend operations happen in Shopify:
- Products, variants, and inventory must be managed in your Shopify admin
Any updates to product info or stock levels need to be made on Shopify, not your CMS. - Orders placed through Buy Buttons appear in Shopify’s order dashboard
This separation might create some operational friction if you’re using your CMS or a separate tool to track other services, bookings, or product availability. - No direct sync with CMS product plugins
Unlike a full migration to Shopify, the Buy Button setup does not integrate with WooCommerce, Webflow CMS, or Squarespace’s inventory tools.
3. Performance Considerations (External Script Load)
Shopify Buy Buttons are powered by externally hosted JavaScript. This can lead to some performance trade-offs:
- Additional scripts may slightly increase page load time
While generally lightweight, the script still adds external HTTP requests that can affect performance, especially on mobile. - iFrames limit design flexibility
Because Buy Buttons render inside iframes, they are isolated from the rest of your site’s CSS and JavaScript. This can make deep customization and performance optimization more difficult. - Third-party script conflicts
On some platforms, other embedded scripts (e.g., popups, analytics tools, sliders) may occasionally conflict with Shopify’s scripts, especially if there are JavaScript errors elsewhere on the page.
When You Should Consider a Full Migration to Shopify
While embedding Shopify Buy Buttons is an excellent way to start selling with minimal changes to your existing website, there comes a point where limitations in functionality, scalability, and user experience may start to hold your business back. In these cases, a full migration to Shopify becomes the more strategic and future-proof option.
1. Growing Product Catalog
If your business begins to expand beyond just a few products, embedding Buy Buttons can become cumbersome:
- Difficult to manage large collections
Manually generating and placing Buy Buttons for dozens (or hundreds) of products creates operational overhead. - No product filtering, categorization, or search
Embedded buttons don’t support Shopify’s powerful navigation features like filters, tags, or on-site search. - No centralized product browsing
Customers won’t be able to explore your full catalog unless each product is linked individually.
In contrast, a full Shopify store allows customers to browse categories, sort products, use filters, and search creating a much more user-friendly experience as your inventory grows.
2. Need for Deeper Integrations
As your business scales, you may need tools that go beyond the limitations of Buy Button functionality:
- Advanced marketing tools like abandoned cart recovery, discount apps, and email marketing automations
- Third-party integrations with shipping providers, CRM systems, ERP platforms, or inventory management tools
- Custom workflows and automation using Shopify Flow, webhooks, and integrations with platforms like Klaviyo, ShipStation, or QuickBooks
These capabilities often require a full Shopify store setup, which provides access to the Shopify App Store and its extensive ecosystem of tools.
3. Better Performance and User Experience
While embedded Buy Buttons are functional, a native Shopify storefront offers a smoother, more optimized shopping experience:
- Faster page loads
With a full Shopify store, product pages, cart, and checkout load more quickly because they’re built into the platform rather than being injected via external scripts. - More consistent branding
With full control over your theme, you can ensure every part of the customer homepage to checkout feels like one cohesive experience. - Optimized for mobile
Shopify themes are responsive by default, offering better performance and usability across all devices compared to iframe-based Buy Buttons. - Seamless checkout flow
Rather than opening modals or redirecting from one platform to another, a Shopify-hosted checkout keeps the process fast and intuitive.
Ready to Add Shopify to Your Website Without Rebuilding Everything?
Partner with Oyecommerz, your trusted Shopify web development experts.
Whether you’re embedding Buy Buttons or planning a full migration, our team helps you sell smarter, faster, and without the usual technical hurdles.
- Fast and seamless integration
- Custom styling to match your brand
- Expert support every step of the way
Let’s make your website ready to sell.
Book a Free Consultation with Oyecommerz today.
Let's Migrate to Shopify today!
Conclusion
Embedding Shopify is a smart, low-cost way to add eCommerce features to your existing site without a full redesign. It’s ideal for bloggers, service providers, and portfolio sites selling a small number of products.
With the Shopify Lite plan, you get access to Shopify’s secure checkout, product management tools, and customizable Buy Buttons perfect for starting small.
If your needs grow, or you want a more seamless shopping experience, consider full Shopify web development to unlock the platform’s full power.
Frequently Asked Questions
Yes, you can add your own custom fonts to Shopify by uploading the font files (like .woff
, .woff2
, or .ttf
) and using the @font-face
rule in your theme’s CSS. This allows you to use brand-specific or licensed fonts in your store.
To add a custom font style, upload the font file under Settings > Files, copy the URL, and then define it in your CSS using @font-face
. After that, assign the font to specific elements like headings or body text in your theme’s CSS (e.g., theme.css
or base.css
).
You can add custom styles by editing your theme’s CSS files. Go to Online Store > Themes > Edit code, then open a file like theme.css
or base.css
, and add your custom CSS rules. For example, you can change font sizes, colors, margins, or apply new fonts.
You can make more money on Shopify by increasing order value (using bundles or upsells), running retargeting ads, offering subscriptions, and building customer loyalty. Email marketing and product reviews also play a major role in turning visitors into repeat buyers.
Yes, Shopify allows you to change fonts easily through the theme editor if you’re using supported fonts. For more advanced customization, you can add new fonts manually or with the help of a Shopify app.
You can add custom text to your Shopify store through theme customization or by editing your theme’s Liquid files. Use the Theme Editor to change content in sections, or go to Edit code to add HTML text in templates like product.liquid
, index.liquid
, or custom sections.
To import Google Fonts, go to Google Fonts, select your font, and copy the <link>
tag or @import
code. Then, paste the link inside your theme.liquid
file’s <head>
section. Finally, apply the font in your CSS using font-family
.