Are you running your online store on Neto but facing limitations that are holding back your growth? As your eCommerce business expands, you need a platform that can keep up with your ambitions. Shopify, known for its scalability, user-friendliness, and extensive customization options, has become the go-to choice for online retailers looking to take their stores to the next level.
Migrating from Neto to Shopify may seem like a difficult process, but with the right approach, it can be seamless and stress-free. This guide will walk you through everything you need to know about moving your store to Shopify while minimizing downtime, avoiding data loss, and ensuring your customers experience a smooth transition.
Table of Contents
ToggleWhy Migrate Neto Store to Shopify?
Overview of Neto
Neto is an Australian-based eCommerce platform designed for businesses looking for an all-in-one solution to run their online store. It provides features such as product management, inventory control, order management, customer data tracking, and integrated shipping options. Neto is popular for its ability to handle complex product catalogs and integrate with various third-party services like accounting software and payment gateways. It offers both front-end and back-end customization, making it a versatile platform for businesses of different sizes.
Limitations of Neto
While Neto has its benefits, there are several challenges businesses often face:
Limited Customization: While Neto offers some flexibility, it’s not as customizable as some other platforms. Customizing the design, adding unique features, or integrating with new tools often requires advanced technical knowledge or developer resources, which can be expensive.
Scalability Issues: As your business grows, Neto can become difficult to scale. Handling increased product listings, traffic, or orders may require manual intervention and additional infrastructure, which can lead to higher costs and performance issues.
High Maintenance Costs: Neto requires ongoing maintenance, including updates, security patches, and customizations. This often means businesses need to rely on developers or support teams to ensure everything runs smoothly, resulting in high ongoing costs and complexity.
Complex User Interface: Neto’s interface can be difficult for non-technical users to navigate. Managing inventory, orders, and customer data often requires a steep learning curve, which can slow down day-to-day operations.
Why Shopify is a Better Alternative
Shopify provides a more user-friendly and scalable solution for eCommerce businesses:
Ease of Use: Shopify’s intuitive, drag-and-drop interface allows business owners to manage their store without technical expertise. The platform is designed for ease of use, making it easy for users to launch and operate their store with minimal training.
Robust App Ecosystem: Shopify’s extensive app marketplace offers hundreds of apps and integrations to enhance your store’s functionality. Whether it’s marketing tools, advanced analytics, shipping solutions, or loyalty programs, Shopify has an app to suit every business need.
Scalability: Shopify’s cloud-based infrastructure supports businesses at every stage, from startups to large enterprises. It can handle high traffic, large product catalogs, and increased orders without slowing down or requiring major upgrades.
Built-in Marketing Tools: Shopify includes SEO optimization, email marketing tools, social media integrations, and discounts/promotions directly within the platform. This makes it easier to drive traffic and increase conversions without relying on third-party services.
24/7 Customer Support: Shopify offers round-the-clock customer support through live chat, email, and phone. This ensures that any issues can be quickly resolved, helping businesses minimize downtime and maintain operations smoothly.
Overall, Shopify provides a more flexible, user-friendly, and cost-effective solution for growing businesses looking to scale their eCommerce operations. With its ease of use, powerful features, and strong customer support, it’s a strong alternative to Neto for businesses looking to improve performance and user experience.
Step-By-Step Guide for Migrate Neto Store to Shopify
Step 1: Pre-Migration Considerations
1.1 Data Backup
Before making any changes, create a full backup of your Neto store. This backup should include:- Product Data: Titles, descriptions, images, SKU, pricing, categories, and stock levels.
- Customer Data: Customer profiles, addresses, purchase history, and account details.
- Orders: Order history, payment statuses, shipping information.
- SEO: URLs, meta titles, and descriptions, as well as redirects.
1.2 Audit Current Store
Analyze your current store’s performance, identifying elements that you want to improve when migrating to Shopify:- Products: Review product variants, collections, and attributes.
- Customers: Check if all customer data is accurate.
- SEO Structure: Audit your current SEO rankings and ensure URLs are optimized for Shopify.
- Third-Party Integrations: List all integrations and apps currently in use, such as payment gateways, shipping services, or email marketing tools.
1.3 Choose the Right Shopify Plan
Shopify offers several pricing plans (Basic, Shopify, and Advanced). Choose a plan based on your store’s size, traffic, and feature needs. Most stores find the Shopify or Advanced Shopify plan ideal for migration, offering lower transaction fees, better reporting, and support for larger product catalogs.Step 2: Export Data from Neto
Once you have backed up your data and chosen the right Shopify plan, it’s time to export your Neto store data. The following sections cover how to export essential data
2.1 Export Products
In Neto, navigate to the Product Management section to export your product catalog. Typically, you can export the following data:
- Product Titles
- Descriptions
- Categories
- Pricing
- SKUs
- Images
Neto allows you to export data in CSV format, which is compatible with Shopify’s import process.
2.2 Export Customers
Export your customer data, including names, email addresses, and order histories. This data is essential to maintaining customer relationships post-migration. In Neto, you can export customer data as a CSV file through the Customers module.
2.3 Export Orders
Similarly, you need to export order history, including order IDs, dates, products purchased, and customer information. This ensures you have records of all transactions, which is critical for accounting and customer service.
2.4 Export SEO Data
Export URLs, meta titles, and meta descriptions to maintain your store’s SEO structure. Neto allows for exporting this data via the Content Management or SEO settings. You can also note down any necessary redirects for when you launch on Shopify.
Step 3: Import Data to Shopify
One of the significant ‘Benefits of Migrating Custom Store to Shopify‘ is the platform’s robust import tools, designed to streamline data transfer from other e-commerce systems. With options like CSV imports and third-party tools, Shopify ensures your product catalog, customer data, and order history are moved over seamlessly, preserving the integrity of your information.
3.1 Product Import
Shopify’s Product Import Tool allows you to upload product data in CSV format. Navigate to Products > Import and upload the CSV file exported from Neto. Shopify will map the fields, but you may need to adjust certain attributes like:
- Variants: Shopify handles variants differently, so ensure that product variants like size, color, or material are properly formatted.
- Categories to Collections: Shopify uses Collections instead of categories, so you will need to map categories from Neto to Shopify collections.
- Product Images: Ensure that all product image URLs are correctly imported.
3.2 Customer Import
Similarly, import your customer data by going to Customers > Import in Shopify. Make sure the CSV file include the following details
- First Name, Last Name
- Email Address
- Phone Number
- Addresses
If you offer customer accounts, Shopify will send an account activation email to customers once the import is complete.
3.3 Order Import
Order import is a bit more complex and often requires the use of third-party apps like Matrixify. This app can handle complex data imports, such as order history and transaction details. Alternatively, you can use Shopify’s API to import orders programmatically.
3.4 SEO Import and Redirects
Ensure that SEO metadata like URLs, meta titles, and descriptions are properly imported. Shopify has built-in SEO tools to help with this, but it’s crucial to implement 301 redirects from your old Neto URLs to the new Shopify URLs to preserve your search rankings.
Step 4: Design and Theme Customization
After importing data, the next step is to customize the design and layout of your Shopify store. Shopify offers a range of free and paid themes that you can use as a base.
4.1 Choosing a Theme
Pick a theme that closely matches the style and functionality of your previous Neto store. Shopify themes are highly customizable, so you can adjust them to fit your brand’s aesthetic and needs.
4.2 Customizing the Theme
Use Shopify’s Theme Editor to customize the appearance of your store. You can adjust elements like:
- Logo and Branding: Upload your logo and set your brand’s color scheme.
- Homepage Layout: Customize featured products, banners, and sections to highlight your key offerings.
- Navigation: Ensure that your main navigation and footer links are set up to mirror the structure of your Neto store.
4.3 Mobile Optimization
Shopify themes are responsive, but you should still check how your store appears on mobile devices and make any necessary adjustments.
Step 5: App Integrations and Functionality Setup
Shopify’s App Store offers a wide variety of apps to extend the functionality of your store. After migrating, you’ll need to integrate essential third-party services like payment gateways, shipping solutions, and marketing tools.
5.1 Payment Gateways
Set up a payment gateway compatible with Shopify, such as Shopify Payments, PayPal, or Stripe. You can configure this under Settings > Payments.
5.2 Shipping Setup
Configure shipping methods, carriers, and rates under Settings > Shipping and Delivery. If you used third-party shipping apps in Neto, search for Shopify equivalents in the app store.
5.3 Marketing and Analytics Tools
Install marketing tools like Google Analytics, Facebook Pixel, or email marketing integrations like Klaviyo or Mailchimp.
Step 6: Testing and Launch
Before launching store, it’s important to roughly test it to make sure everything works as we expect.
6.1 Test the User Experience
- Navigation: Ensure all menus, links, and buttons are functioning properly.
- Checkout Process: Go through the entire purchase process to make sure payment, shipping, and tax calculations are accurate.
- Mobile Testing: Test the site on various mobile devices to ensure it’s fully responsive.
6.2 Test Integrations
Make sure all third-party integrations, such as payment gateways, shipping solutions, and analytics tools, are functioning correctly.
6.3 SEO Checks
Verify that your 301 redirects are set up correctly, and check for broken links or missing metadata.
6.4 Test Orders
Place test orders to check order processing, payment, and fulfillment workflows.
Step 7: Launch Your Shopify Store
Once all testing is complete and you’re satisfied with the store’s performance then it’s time to make it live. Shopify allows you to pick a custom domain or transfer the existing one from your Neto store.
- Transfer Domain: If you’re a custom domain user then update the DNS settings to point to Shopify Service. You can manage this in your domain registrar’s settings.
- Launch Announcement: Inform your customers about the migration via email or social media, highlighting any new features or improvements.
- Monitor Performance: After launch, keep an eye on performance, traffic, and customer feedback. Use tools like Google Analytics and Shopify Analytics to track user behavior and sales.
Post-Migration Best Practices
Migration is only half the battle. Once your store is up and running on Shopify, be sure to follow these best practices to ensure smooth operation and sustained growth:.
Test Your Store Thoroughly: Once you have done everything, test everything on your new Shopify store. That means browsing products, completing orders, checking customer accounts, as well as testing SEO redirects.
Optimize Store Performance: Shopify Analytics and reports enable you to track how your store operates. Ensure that your loading times are not slow by compressing images and eliminating apps you do not use to create a smooth user experience.
Integrate Key Apps: Take a dive into the Shopify App Store and explore applications that might help power up your stores’ functionality, such as email marketing tools and loyalty programs, and advanced reporting apps.
Train Your Team: If you have an actual team in place, trained on the Shopify dashboard and its key features, you’ll be able to ensure seamless daily operations.
Track SEO Performance: Track search engines for your website for a decline in rankings after the migration. Tools like Google Search Console can be quite useful to see such changes and alter SEO accordingly.
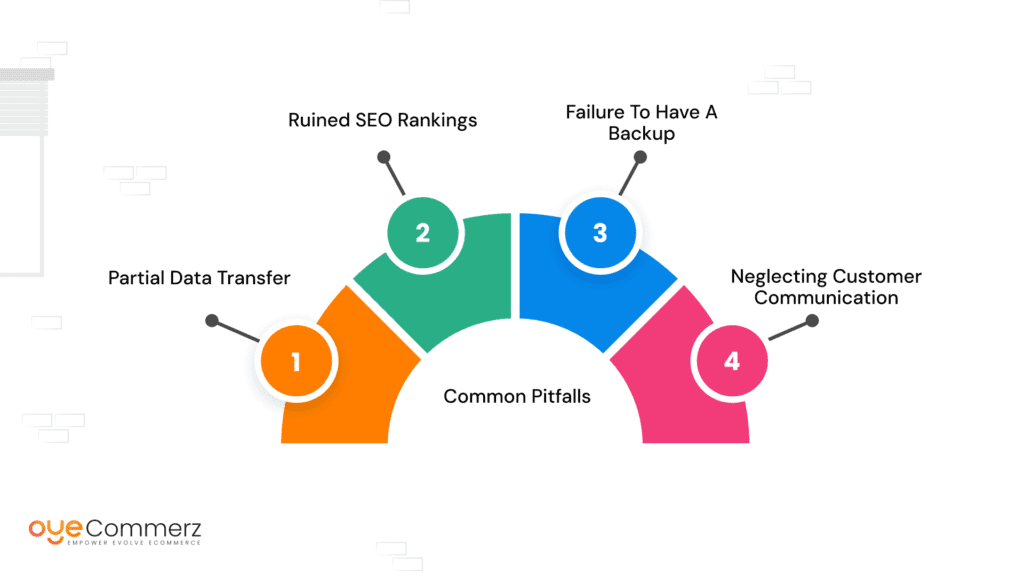
Common Pitfalls to Avoid During Neto to Shopify Migration

The process of migration is quite simple, but there are several pitfalls, one must be cautious of:
Partial Data Transfer
This is probably the most common issue that occurs with a migration process that causes some of the data items to be incomplete or even corrupted. Always verify your exported files, and if you’re not sure or have a large amount of data, consider using a migration tool or expert service to ensure everything imports correctly.
Ruined SEO Rankings
Malfunctioning URL redirects often result in broken links and a loss in search rankings. Don’t forget to establish 301 redirects and update your sitemap in Google Search Console.
Failure to Have a Backup
Before you shift over your store, ensure that you are migrating with a full backup of your Neto store. It is always a failsafe in case something goes wrong while you are transferring.
Neglecting Customer Communication
Migrating to a new platform can temporarily disrupt your store. Be sure to communicate with your customers about the migration, any potential downtime, and what they can expect from the new Shopify experience.
Ready to Seamlessly Migrate Your Neto Store to Shopify?
At Oyecommerz, we specialize in flawless Shopify store migrations with zero downtime and 100% data integrity. Oyecommerz Migration team of experts will handle every step, from product data and customer information to design customization and SEO optimization, ensuring your store is ready for success on Shopify.
Let us help you make the move effortlessly! Get in touch today for a free consultation and start your migration journey with confidence.
Contact to Migrate your Site to Shopify Now
Conclusion
Migrating from Neto to Shopify can offer significant benefits for your e-commerce business, including improved scalability, better user experience, and access to a rich ecosystem of apps and tools. By following the steps shown in this guide, you can make sure a seamless migration, minimize downtime, and maintain the integrity of your data. With careful planning, thorough testing, and the right tools, your Shopify store will be ready to take your e-commerce business to the next level.
Frequently Asked Questions
Migrating from Neto to Shopify offers better scalability, a user-friendly interface, and access to powerful Shopify apps for enhanced store functionality.
The Neto to Shopify migration timeline depends on store size and data complexity, but most migrations take a few days to a couple of weeks.
You can migrate products, customers, orders, categories, SEO URLs, and reviews while ensuring a smooth transition with minimal downtime.
While Shopify offers migration tools, hiring a Shopify expert can ensure a seamless transfer, especially for complex stores with custom features.
Proper SEO migration strategies, such as 301 redirects and metadata preservation, help maintain your rankings and organic traffic.
Several Neto to Shopify migration tools exist, but professional Shopify migration services like Oyecommerz ensure a hassle-free transition.


