Before diving into custom Shopify theme development, it’s essential to understand how Shopify themes work. A well-structured theme defines how your store looks, feels, and functions, directly impacting user experience and conversions.
What is a Shopify Theme?
A Shopify theme is a collection of files that control your store’s design and layout. It determines how products, collections, pages, and checkouts appear to customers. Shopify offers both pre-built themes and the ability to create fully custom themes for a unique brand identity.
Overview of Shopify’s Liquid Templating Language
Shopify themes are powered by Liquid, a flexible and easy-to-learn templating language. Liquid acts as a bridge between the Shopify backend and the front-end store, dynamically pulling data (like product details) and displaying it in the theme.
Key elements of Liquid syntax:
- Objects: Pull store data (e.g., {{ product.title }} displays the product name).
- Tags: Control logic (e.g., {% if product.available %} In Stock {% endif %}).
- Filters: Modify output (e.g., {{ product.price | money }} formats the price).
Shopify’s Theme Architecture
A Shopify theme consists of different folders and files that structure the store’s front-end. Here’s a breakdown:
- Sections – Customizable blocks of content (e.g., homepage banners, product carousels).
- Templates – Define page structures like product pages (product.liquid), collection pages (collection.liquid), and the homepage (index.liquid).
- Snippets – Reusable pieces of code (e.g., add-to-cart buttons, review sections).
- Assets – Holds CSS, JavaScript, and image files to style and script the theme.
- Config – Stores theme settings, allowing merchants to change colors, fonts, and layouts via the theme editor.
- Locales – Manages translations for stores operating in multiple languages.
Custom Themes vs. Pre-Built Themes
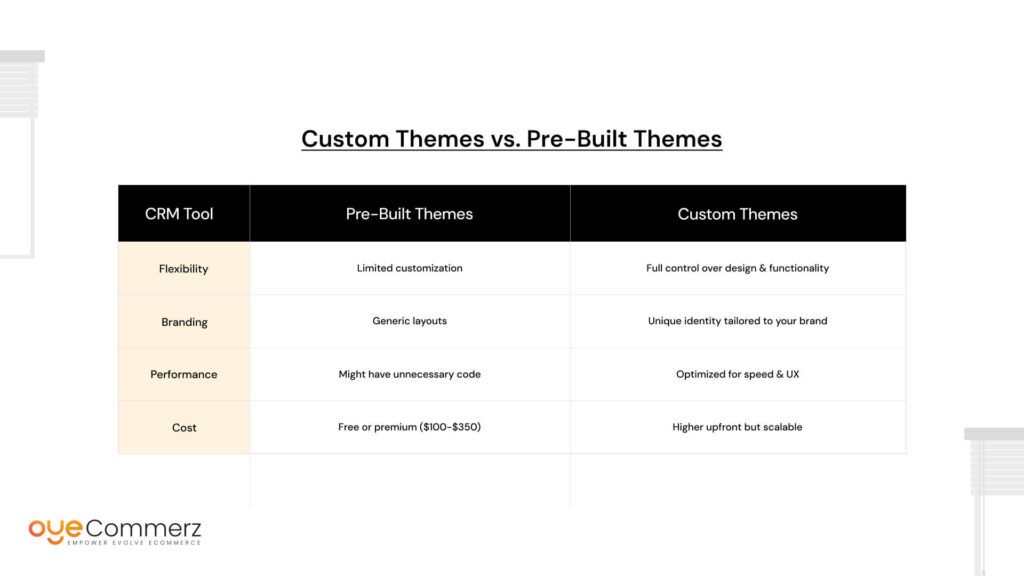
Custom themes offer a better user experience, faster load times, and a unique brand identity, essential for standing out in a competitive eCommerce landscape.
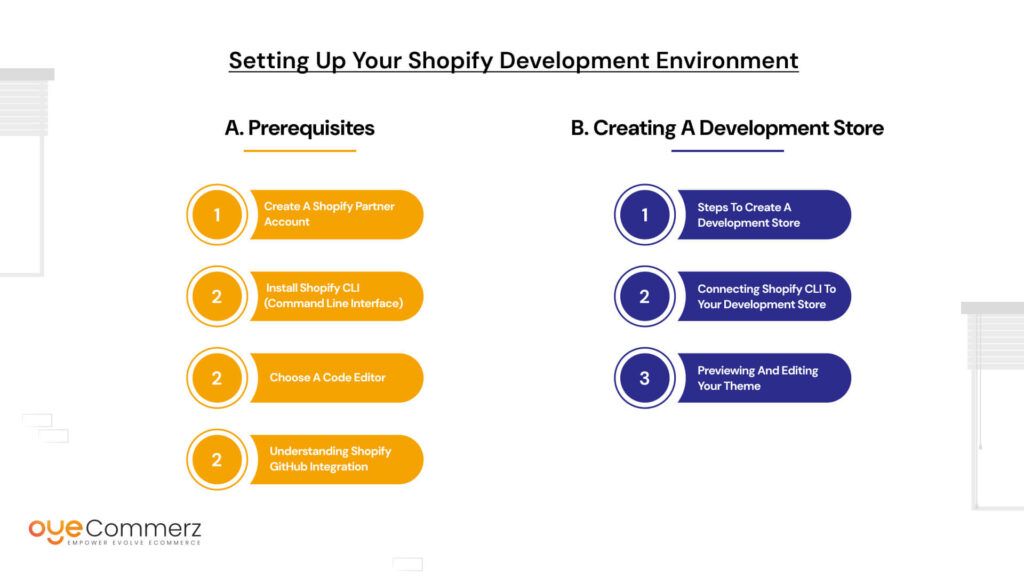
Before you start building a custom Shopify theme, you need to set up your development environment properly. This ensures a smooth workflow, easier debugging, and efficient testing. Let’s go step by step.
A. Prerequisites
1. Create a Shopify Partner Account
To develop themes, you need a Shopify Partner Account. This is free and allows you to create unlimited development stores without needing a paid Shopify plan.
Steps to create an account:
- Go to Shopify Partners
- Click Join Now and sign up with your email.
- Complete your profile by selecting “I want to build stores for clients” or “I’m learning.”
- Once done, you’ll gain access to the Partner Dashboard, where you can create development stores.
2. Install Shopify CLI (Command Line Interface)
The Shopify CLI (Command Line Interface) is a tool that helps you create, test, and manage themes directly from your terminal.
How to install Shopify CLI:
For Windows: Use PowerShell and install via npm:
- npm install -g @shopify/cli
For Mac/Linux: Use Homebrew:
- brew tap shopify/shopify
- brew install shopify-cli
After installation, verify it by running:
- shopify version
3. Choose a Code Editor
A code editor makes it easier to write and manage your theme files. Popular choices include:
- VS Code – Lightweight, has extensions for Liquid syntax highlighting.
- Sublime Text – Simple and fast, great for quick edits.
Install one based on your preference and set it as your default editor.
4. Understanding Shopify GitHub Integration
GitHub integration helps you track changes, collaborate, and revert code if needed. Shopify allows direct GitHub syncing, so any changes you push to your repository can be applied to your Shopify theme automatically.
To connect:
- Create a GitHub repository.
- In your Shopify Admin, go to Online Store > Themes.
- Click Add theme > Connect from GitHub.
- Authorize Shopify to access your repository.
B. Creating a Development Store
A development store is a test environment where you can build themes without affecting a live store.
Steps to create a development store:
- Log into your Shopify Partner Dashboard.
- Click Stores > Add Store.
- Select Development Store and fill in store details.
- Click Create Store, and Shopify will generate a new test store for you.
Connecting Shopify CLI to Your Development Store
Once your store is ready, connect it to Shopify CLI for faster theme management.
- Open your terminal and log in:
shopify login –store yourstorename.myshopify.com - Use this command to list themes:
shopify theme list
- Pull an existing theme to start editing:
shopify theme pull
Previewing and Editing Your Theme
To edit your theme:
- Navigate to Online Store > Themes in your admin panel.
- Click Customize to make changes visually.
Use the Shopify CLI command below to preview your theme in real-time:
- shopify theme serve
This will open a local preview where you can test your changes before publishing.
With everything set up, you’re now ready to start building your Shopify custom theme!
Once you’ve built your Shopify custom theme, testing and debugging are crucial to ensure everything functions smoothly. A glitchy or slow website can drive away potential customers, so let’s go over how to preview, debug, and fix errors efficiently.
How to Preview and Test Changes Locally
Before publishing your theme, you need to test it locally. Shopify’s Theme Kit or Shopify CLI allows you to preview your theme in a real Shopify environment without making changes to your live store.
Run the following command in your terminal:
- shopify theme serve
- This launches a local server where you can preview changes instantly.
- Use multiple devices to check for responsiveness. Ensure the design works well on desktop, mobile, and tablets.
- Test various features like add-to-cart, checkout, and dynamic sections to verify everything runs smoothly.
Using Chrome DevTools for Debugging
Chrome DevTools is an essential tool for spotting issues. To access it:
- Right-click anywhere on your Shopify store and select Inspect.
- Navigate to the Console tab to check for JavaScript errors.
- Use the Network tab to monitor load times and detect failing resources.
- Adjust CSS directly in the Elements tab to fine-tune your styles in real-time.
A common issue is images taking too long to load. You can fix this by enabling lazy loading:
<img src=”{{ product.image | img_url: ‘large’ }}” loading=”lazy” alt=”Product Image”>
This ensures images load only when needed, improving page speed.
Shopify’s Theme Check Tool for Code Validation
Shopify provides the Theme Check tool to analyze your code for errors and best practices. To install it, run:
gem install theme-check
Then, check your theme by running:
theme-check
This scans your Liquid files for potential issues, such as:
- Unused variables
- Deprecated code
- Performance optimizations
Fixing these errors helps maintain a clean, efficient, and future-proof Shopify theme.
Common Errors and How to Fix Them
- Liquid Syntax Errors
Error: {% if product.title = “Shoes” %} (Incorrect comparison operator)
Fix: {% if product.title == “Shoes” %} (Use == instead of =) - JavaScript Not Working?
Check if:
- Your script is inside {% javascript %} {% endjavascript %} in Liquid.
- You’re referencing the right elements (use console.log() to debug).
- Slow Loading Pages?
- Compress images using Shopify’s built-in tools.
- Minify CSS and JavaScript files.
By testing thoroughly and debugging errors effectively, you can ensure your Shopify theme is fast, functional, and error-free before going live!
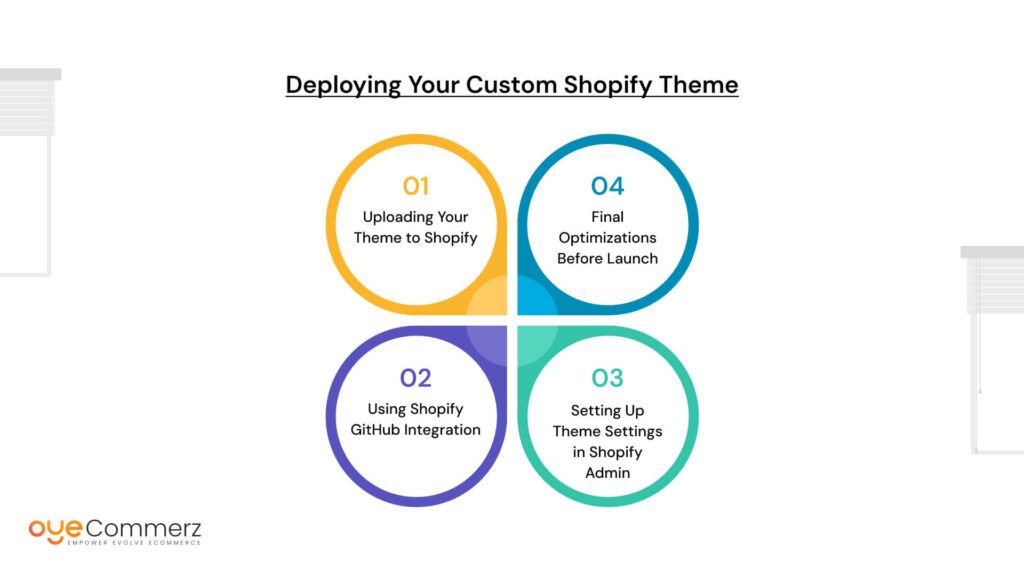
Deploying Your Custom Shopify Theme
Once your custom Shopify theme is built and tested, it’s time to deploy it. A smooth deployment ensures your store is live with a polished, optimized, and fully functional theme.
1. Uploading Your Theme to Shopify
To upload your theme:
- Zip your theme folder.
- Go to Shopify Admin → Online Store → Themes.
- Click the Upload theme and select your zipped file.
- Once uploaded, click Publish to make it live.
Alternatively, use the Shopify CLI with:
shopify theme push
This directly updates your theme without manually uploading files.
2. Using Shopify GitHub Integration
For better collaboration, integrate your theme with GitHub:
- In Shopify Admin, go to Themes → Add from GitHub.
- Connect your repository and select the theme branch.
- Shopify will sync updates automatically whenever changes are pushed to GitHub.
This is ideal for teams working on a theme together.
3. Setting Up Theme Settings in Shopify Admin
Before launching, configure theme settings under Online Store → Customize:
1. Add store branding (logo, colors, fonts).
2. Set up homepage sections.
3. Configure checkout and cart settings.
4. Final Optimizations Before Launch
- Minify CSS & JS for better performance.
- Optimize images for faster load times.
- Test on mobile & different browsers.
- Enable Google Analytics & SEO settings.
Once everything looks perfect, hit Publish, and your Shopify store is live!
Should You Develop a Shopify Theme Yourself or Hire Experts?
Deciding whether to build a Shopify theme yourself or hire professionals depends on your skills, goals, and business needs.
When to DIY
- You have basic coding knowledge – If you’re comfortable with HTML, CSS, and Liquid, you can customize themes.
- You want complete creative control – DIY allows you to design every element to match your brand.
- You’re learning Shopify development – If you’re experimenting or starting out, building your own theme is a great learning experience.
When to Hire Shopify Experts
- You need a highly customized store – Experts can craft a unique, scalable theme tailored to your business.
- You lack time or coding skills – If development feels overwhelming, outsourcing saves time and ensures a professional result.
- You want an SEO-optimized, conversion-focused theme – Experts build with best practices to improve speed, UX, and sales.
Choose wisely based on your needs!
Want a custom Shopify theme that’s professional, high-converting, and tailored to your brand? Whether you DIY or need expert help, make the right choice for your business.
Need a hassle-free, expert-built theme? Let’s bring your vision to life—contact us today!