Have you ever wondered if your WooCommerce store is holding you back from scaling your business? If you’re looking for a platform that’s easier to manage and can help you grow faster, Shopify might be the perfect fit. In fact, businesses that migrate to Shopify often see a 25–30% boost in efficiency and sales within the first few months!
Switching platforms might sound difficult, but it doesn’t have to be. This guide is here to walk you through the entire WooCommerce to Shopify migration process from start to finish step by step. No technical jargon, no overwhelm just a clear, beginner-friendly roadmap to help you make the switch effortlessly.
Ready to explore a smoother, more scalable future for your online store? Let’s get started!
Shopify’s remarkable growth
Shopify’s evolution from a small start-up to a global e-commerce giant is truly extraordinary. By 2024, it’s evident that the platform has not only maintained its growth but also intensified it. Hosting over 4.4 billion online stores and boasting an average of 2.1 million daily active users, Shopify has firmly established itself as a top e-commerce platform worldwide. This swift expansion is driven by the onboarding of 680,000 new merchants since 2019, raising the total number of merchants to an impressive 1.75 million.
How to Migrate Your Store From WooCommerce to Shopify
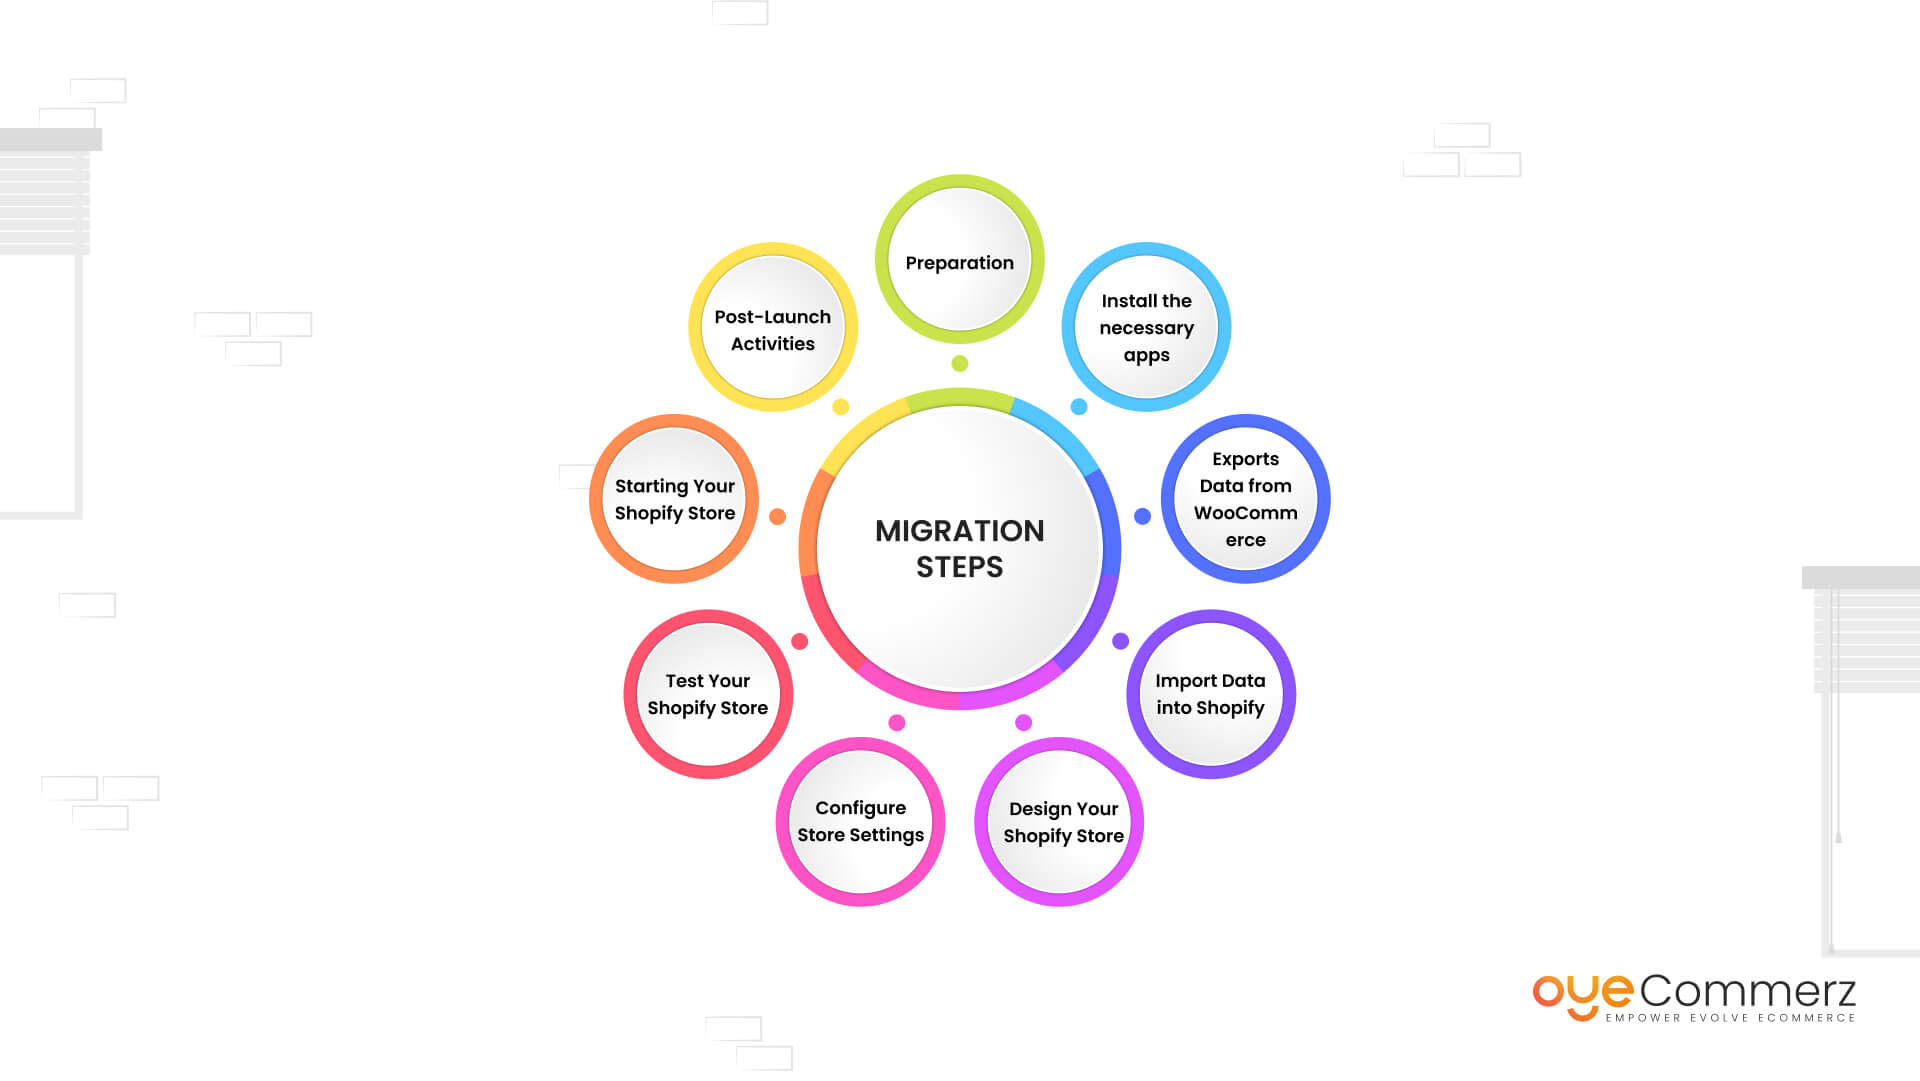
Below is a detailed guide to help you through the process:
Step 1: Preparation
Migration is a complicated activity widely used for information transfer among different systems before its implementation, certain preparations are necessary.
Backup Your WooCommerce Store: You should back up the details related to the product, and customers’ details such as their information, and order history. This makes sense for the simple reason that you will have a copy of your store and in case something goes wrong during the migration your data will still remain intact.
Review Your Current Store: Make listing of all the feature and functionality of the current WooCommerce store platform that you are using. Even though Shopify has a drag-and-drop website builder, only by identifying the themes, plugins, and customizations used in WordPress, then you will be able to know equivalent features in Shopify.
Set Up a Shopify Account: If you do not already have one, create your Shopify account today. Select a plan that you believe may be the most effective for your company’s model. New Shopify store owners have an option of a two-week trial period at no charge, which would enable one to experiment with the newest store without necessarily having to make payments.
Step 2: Install the necessary apps
Make sure that certain applications are installed WattZoom from the Google Play Store has to be installed for easy downloading Dolphin Browser has to be installed as it is a browser that offers a greater mobile experience.
To help in migration, Shopify has developed several apps that can aid in the move. A very effective app that I deem pertinent for this task is known as the “Store Importer” app.
Install the Store Importer App: When shopping at the store click on the app store available in the store then search “Store Importer”. To use it, uninstall it from the App Store and install it on your Shopify store.
Review Other Helpful Apps: Based on this, consider other applications that may help address different parts of the migration process, including data synchronization, preservation of SEO optimization, and customer relations.
Step 3: Exports Data from WooCommerce
First of all, before migrating data you will need to export it from WooCommerce.
Export Products: Select Products from the menu and go to the WooCommerce section and you will see that there is an option to export products. Select the information that you would like to copy, for instance, product title, description, and categories, images as well. Export your final file as a CSV file.
Export Customers and Orders: Likewise, navigate to the heading WooCommerce > Customers/Orders and export the information that is located there. It is also important to ensure that all information needed for the export files is input and exported accordingly.
Export Other Relevant Data: Other useful information includes reviews, custom fields, and others; make sure to export these as well in case of need.
Step 4: Import Data into Shopify
Retailers often need to import data into Shopify for various purposes, including product information management and customer relationship management.
Now that your data is extracted from WooCommerce, you can proceed with its import to Shopify.
Import Products: To begin using the Store Importer app on Shopify, follow the steps outlined below. Select WooCommerce as the source for the cart and then upload the CSV file that was created by exporting data in WooCommerce. After the data has been imported, check in the new table for the correct mapping and to make sure everything looks good.
Import Customers and Orders: This needs to be done in the similar manner with the Customers and Orders CSV files being uploaded. Ensure that all customer information, as well as orders and other purchase records, have been imported correctly.
Review and Adjust Data: After an import is finished, it is recommended to check your entire Shopify store to make sure all the data has been imported properly. As with the home page, there may be some changes to the product descriptions, categories, and images in the clothing section.
Step 5: Design Your Shopify Store
Now that you have imported your data, let’s customize the front-end front of your Shopify store based on your brand’s image and consumer experience.
Choose a Theme: When it comes to Beautiful Themes for your online store, Shopify has hundreds of free and paid built-in themes. Select the theme that seems the most appropriate for your store and make the necessary changes to your store’s theme. Access the Online Store and click on Themes to find and utilize your desired theme.
Customize Your Theme: The main features are the ability to modify the overall design of a website using Shopify’s theme editor and changing aspects such as the layout, colors, fonts, and more. A few other final things that you can do for your online store, include adding your own logo and making changes to the navigation menus so that your store appears as professional and decent as possible.
Install Necessary Plugins: Go to the Shopify App Store to browse and easily add apps with the functions that you require in your app. This could include applications such as SEO applications and marketing applications as well as inventory management applications.
Step 6: Configure Store Settings
Now that you have completed your store design, take basic settings to make sure that things are properly in order.
Payment Gateways: Introduce purchase accesses, and payment systems to reach clients. Popular credit cards, PayPal, and other third parties accept payments through Shopify for orders. At the top right-hand corner, click on the icon and select Settings – Payments to view and set the payment options.
Shipping Settings: Shipping settings are found in the settings menu of your store and when configured, you will be able to determine your shipping zones, rates, and methods. I should also click the Settings button and then select Shipping and Delivery to configure shipping options.
Taxes: This may include collection, submission, storage, and treatment of your information by the provider of the service you are accessing or by third-party providers. This can be done in the Settings menu > Taxes section.
Checkout Settings: Extend your checkout process by deciding upon options, various types of customer accounts, order management, and emails. Change these settings in Square Dashboard > Settings > Checkout.
Step 7: Test Your Shopify Store
Always make sure to go through the crucial areas to ensure they are okay before launching your new Shopify store.
Test Orders: To check that the checkout process is smooth and payment gateways are functional, place a few dummy orders.
Review Product Pages: On the homepage of an e-commerce site, look for basic product images and product information to make sure that they are properly formatted.
Check Navigation: Check out how your customers are going to navigate through menus and links – it has to be clear how to get to products.
Test on Different Devices: Ensure your store is responsive You should make sure your store displays correctly on different devices on different browsers.
Step 8: Starting Your Shopify Store
After optimizing your store, as per the results seen in testing, you should go ahead and launch the store on Shopify.
Choose a Domain: If you already own the domain, you may transfer it to Shopify, or if you want to change the DNS records to point to your actual shop on Shopify. You can also get a new domain on Shopify if you prefer owning a new one instead of the one you have now.
Enable SSL Certificate: Security of your store is important so make sure that SSL is enabled. This can be done via Settings > Domains.
Announce Your New Store: Make your customers aware of changes that have taken place where they can access your products, that is, the new Shopify store. Notify your community through your social media profiles, your email lists, and update all the marketing platforms you use.
Step 9: Post-Launch Activities:
When you have completed the above steps to build your Shopify store, further steps are needed to make the transition successful.
Monitor Performance: Monitor its operations and respond to complications as and when they come up. One key aspect to utilize is to leverage the Shopify analytics and reporting tools to track the important aspects.
SEO and Redirects: Make sure your store SEO is configured correctly and set redirects from your old WooCommerce URLs to new Shopify URLs to help maintain your search engine rankings.
Customer Support: It is also beneficial to remember to be ready and willing to provide excellent customer service as and when your customers adjust to the new store format.
Continuous Improvement: Always ask for feedback from shoppers and constantly aim to optimize your Shopify store.
Top Read: WooCommerce to Shopify – Tips to Troubleshoot Common Issues
Elevate Business with OyeCommerz’s WooCommerce to Shopify Migration Services!
Elevate your online store’s potential with OyeCommerz’s WooCommerce to Shopify Migration Services. Our expert team ensures a seamless transition, preserving the integrity of your data while enhancing your store’s performance. Experience a smooth migration to Shopify’s robust platform, and unlock new opportunities for growth and success with OyeCommerz. Trust us to take your business to new heights in the competitive world of e-commerce.
Conclusion
Switching from WooCommerce to Shopify is not a difficult task, but it must be done professionally that too with proper planning. This comprehensive guide gives you step-by-step instructions to guarantee the correct transfer of your data, your store’s fine appearance, and all the settings you need for the project. Forming a new team and migrating to Shopify can help you achieve a more convenient, safe, and advanced platform for your company’s success. Change is inevitable, therefore, it is advisable to fully grasp and utilize all the aspects of having a Shopify store to advance your online business venture.